Stepping into the world of DIY plumbing tips for beginners can feel overwhelming, but the truth is that most common household plumbing issues are far more manageable than you might think. Whether you are dealing with a dripping faucet, a slow drain, or low water pressure, understanding the fundamentals of basic plumbing repairs can save you hundreds of dollars in professional service calls each year. This comprehensive guide walks you through essential tools, step-by-step fixes, safety precautions, and expert recommendations so you can confidently tackle your next plumbing DIY project without calling a contractor.
Essential Plumbing Tools Every Beginner Should Own
Before you attempt any repair, having the right plumbing tools for beginners in your toolbox is non-negotiable. Professional plumbers invest in quality equipment for a reason, and you should follow the same philosophy. Below is a curated list of the most important tools to start with:
- Adjustable wrench — The single most versatile plumbing tool. Use it to tighten or loosen nuts on faucets, shut-off valves, and pipe fittings.
- Plunger (cup and flange style) — A cup plunger handles sink and flat surfaces, while a flange plunger is essential for toilet clogs.
- Plumber’s tape (Teflon tape) — This thin, white tape seals threaded pipe connections and prevents leaks in threaded joints.
- Basin wrench — Designed specifically for tightening or loosening nuts in tight spaces under sinks where a standard wrench cannot reach.
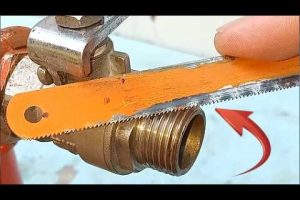
- Pipe cutter — Provides clean, precise cuts on copper and PVC pipes, far superior to using a hacksaw.
- Plumber’s putty and silicone sealant — Used for sealing fixtures like sinks, drains, and faucets to prevent water seepage.
- Channel-lock pliers (tongue-and-groove) — Offers a strong grip on smooth pipes and fittings without damaging surfaces.
- Flashlight and mirror — Essential for inspecting dark, hard-to-reach areas under sinks and behind walls.
Investing in a quality starter kit with these items ensures you are prepared for approximately 80% of common household plumbing repairs. Many of these tools cost under $30 each and will pay for themselves with a single successful repair.
Common Plumbing Problems and How to Fix Them
Understanding the most frequent household plumbing issues is the foundation of home plumbing maintenance. Each problem below includes a practical solution that even a complete novice can handle.
Fixing a Dripping Faucet
A dripping faucet wastes up to 3,000 gallons of water per year and drives up utility bills. In most cases, the culprit is a worn-out washer, O-ring, or cartridge inside the faucet body.
- Turn off the water supply valves beneath the sink.
- Open the faucet to release remaining water pressure.
- Remove the handle screw and carefully pull off the handle.
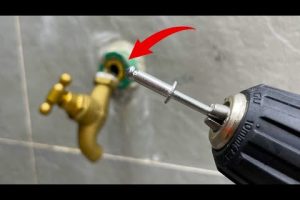
- Use an adjustable wrench to loosen and extract the packing nut.
- Pull out the stem and replace the washer, O-ring, or cartridge as needed.
- Reassemble all components in reverse order and turn the water back on.
Pro tip: Take the old washer or cartridge to your local hardware store to ensure an exact match. Faucet configurations vary significantly between brands and models.
Unclogging a Sink or Shower Drain
Hair, soap scum, and grease are the primary causes of slow or completely clogged drains. Before reaching for harsh chemical drain cleaners — which can corrode older pipes — try these safer methods:
- Plunge the drain — Create a tight seal with a cup plunger and pump vigorously 15 to 20 times to dislodge the blockage.
- Use a drain snake — Feed a handheld auger into the drain pipe to physically pull out hair and debris.
- Baking soda and vinegar — Pour half a cup of baking soda followed by half a cup of white vinegar down the drain. Let it sit for 30 minutes, then flush with boiling water.
Resolving Low Water Pressure
Low water pressure is often caused by mineral buildup inside aerators or showerheads. Unscrew the aerator from the faucet tip, soak it in white vinegar for 30 minutes to dissolve deposits, rinse it clean, and screw it back on. If the problem persists, check for partially closed shut-off valves or inspect supply lines for sediment accumulation.
Must-Know Safety Tips Before You Start Any DIY Plumbing Project
Safety should always come first when working with water supply lines and drainage systems. Even experienced homeowners have encountered unexpected surprises when pipes are older or corroded. Keep these critical plumbing safety tips in mind:
- Always shut off the main water supply before starting any repair. Locate your home’s main shut-off valve and test it regularly so you know it works in an emergency.
- Wear protective gloves and safety glasses to guard against sharp edges, chemical residue, and debris.
- Never use open flames near pipes — many older homes have copper or plastic piping that is highly flammable or can release toxic fumes when heated.
- Know your local building codes — some jurisdictions require permits for specific plumbing modifications, especially when altering drain lines or adding new fixtures.
- Keep a bucket and towels nearby — even minor leaks can release significant water quickly, and containment prevents water damage to floors and cabinetry.
If at any point a repair feels beyond your skill level or you notice corroded pipes, significant corrosion, or sewage involvement, stop immediately and contact a licensed professional.
Step-by-Step Guide to Fixing a Leaky Faucet
Now that you understand the core principles, here is a deeper walkthrough specifically focused on replacing a leaking compression faucet — one of the most common types found in older homes.
| Step | Action | Key Detail |
| 1 | Turn off hot and cold water supply valves | Locate valves under the sink; turn clockwise to close |
| 2 | Open the faucet to drain remaining water | Place a towel in the sink to prevent dropping small parts |
| 3 | Remove the decorative handle cap | Use a flathead screwdriver to gently pry off the cap |
| 4 | Unscrew the handle screw and remove handle | Some handles have a set screw on the underside |
| 5 | Unscrew the packing nut with adjustable wrench | Hold the stem steady while turning the nut |
| 6 | Pull out the stem and remove the old washer | Inspect the seat inside the valve for pitting or damage |
| 7 | Install a new matching washer and reassemble | Apply plumber’s tape to threaded connections for extra seal |
| 8 | Turn water back on and test for leaks | Check around the base and spout carefully |
This method works for most standard compression faucets. For cartridge, ball, or ceramic disc faucets, the internal mechanism differs, but the general approach of disassembly, inspection, and replacement remains the same. Always consult the manufacturer’s repair guide or bring the old part to a plumbing supply store for identification.
When to Call a Professional vs. When to DIY
Understanding the boundaries of your skill set is just as important as knowing how to perform repairs. The table below provides a clear comparison to help you decide whether a project is appropriate for DIY plumbing or requires a licensed professional.
| Task | Difficulty Level | DIY or Professional? | Estimated Savings |
| Replacing a faucet washer or O-ring | Beginner | DIY | $100–$250 per service call |
| Unclogging a standard drain | Beginner | DIY | $100–$300 per visit |
| Replacing a showerhead or aerator | Beginner | DIY | $75–$200 |
| Fixing a running toilet (flapper replacement) | Beginner | DIY | $150–$300 |
| Replacing a garbage disposal unit | Intermediate | DIY (if comfortable with wiring) | $200–$450 |
| Soldering copper pipe joints | Intermediate to Advanced | DIY with experience or hire a pro | $150–$500 depending on scope |
| Replacing a water heater | Advanced | Professional recommended | $500–$1,500 in potential damage avoidance |
| Repiping an entire house | Advanced | Professional only | $4,000–$15,000+ in labor costs |
| Sewer line repair or replacement | Advanced | Professional only | $1,000–$6,000+ |
The golden rule is this: if the repair involves main water lines, sewer connections, gas lines, or significant structural modifications, always hire a licensed professional. For everything else, the plumbing tips for beginners outlined above will serve you well and build your confidence over time.
Frequently Asked Questions
What are the best plumbing tools for a beginner starting out at home?

Start with an adjustable wrench, a set of channel-lock pliers, a plunger (both cup and flange), plumber’s tape, a basin wrench, and a flashlight. These six tools cover the vast majority of household repairs. As you gain experience, you can expand your toolkit with a pipe cutter, drain snake, and a pipe wrench for more advanced projects.
How can I prevent clogged drains in my bathroom and kitchen?
Prevention is far easier than cure. Use drain strainers in both sinks to catch hair and food particles. Pour boiling water down kitchen drains weekly to melt grease buildup. Avoid pouring grease, coffee grounds, or pasta down the drain. For bathroom drains, use a mesh screen over the drain opening and clean it weekly. A monthly flush with baking soda and vinegar keeps drains fresh and clear.
What should I do if my water heater is making strange noises?
Rumbling or popping sounds in a water heater are usually caused by sediment buildup at the bottom of the tank. Turn off the power and cold water supply, then connect a hose to the drain valve at the base of the tank and flush it into a floor drain or bucket. Repeat until the water runs clear. If the noise persists after flushing, the heating element may be failing and could need professional inspection.
Is it safe to use chemical drain cleaners regularly?
No. Chemical drain cleaners contain harsh corrosive agents like sodium hydroxide or sulfuric acid that can degrade PVC pipes, damage older metal piping, and pose serious health risks if mishandled. They also do not address the root cause of clogs. For recurring blockages, a mechanical drain snake or a professional hydro-jetting service is far safer and more effective.
How do I know if a plumbing leak is behind a wall or underground?
Signs of a hidden leak include unexplained increases in your water bill, damp spots or mold on walls or ceilings, the sound of running water when all fixtures are off, and warm spots on floors (which may indicate a hot water line leak). A professional plumber can use acoustic listening devices or thermal imaging cameras to pinpoint hidden leaks without invasive demolition.
What is the most important thing a beginner should remember about DIY plumbing?

Patience and preparation are everything. Turn off the water before you start, photograph or label every connection as you disassemble it, and never force a fitting that appears stuck — it likely needs a different approach or a specific tool. If something does not feel right, step back and research further or consult a professional. There is no shame in knowing when to ask for help.
Conclusion
Mastering DIY plumbing tips for beginners is one of the most rewarding skills you can develop as a homeowner. From understanding which tools to keep in your toolbox to confidently fixing a leaky faucet or unclogging a stubborn drain, each small success builds your competence and saves real money. The key is to start with simple, low-risk projects, follow proper safety protocols, and gradually expand your skill set over time. Remember that plumbing systems are interconnected, so understanding one component often gives you insight into how the entire system works. With the knowledge and practical guidance provided in this article, you are well-equipped to handle the vast majority of household plumbing challenges and take genuine pride in maintaining your home independently.