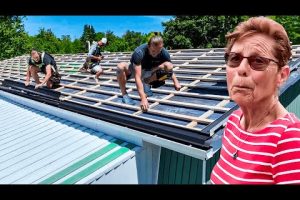
Every homeowner dreads the moment they notice a stain on the ceiling or a loose shingle rattling in the wind. Roof damage doesn’t wait for convenient timing, and hiring a professional roofer can drain your budget fast. That’s where DIY roofing repairs come in — a practical, cost-effective approach that puts control back in your hands. Whether you’re dealing with a minor leak, cracked flashing, or missing shingles, understanding how to tackle these projects yourself can save hundreds — sometimes thousands — of dollars. But roofing work isn’t something you wing. It requires preparation, the right materials, and a solid understanding of your roof’s structure. This comprehensive guide walks you through everything you need to know, from basic fixes a weekend warrior can handle to more advanced techniques that separate a temporary patch from a lasting repair.
What DIY Roofing Repairs Entail and Why Homeowners Are Tackling Them
DIY roofing repair refers to any maintenance or fix a homeowner performs on their roof without hiring a licensed contractor. These projects range from patching a small leak and replacing a few shingles to re-sealing flashing and cleaning gutters. The surge in homeowners embracing roof repair yourself projects isn’t surprising — online tutorials, affordable materials, and a growing DIY culture have made it more accessible than ever. Still, it’s important to understand what falls within a reasonable DIY scope and what demands professional expertise.
The most common reasons homeowners pursue self-directed roof work include:
- Cost savings — professional repairs often run $300 to $1,000+ per visit
- Immediate response — you don’t have to wait days for a contractor’s schedule
- Small-scale damage — minor issues like cracked shingles or loose caulking are manageable
- Learning and confidence — gaining hands-on knowledge about your home’s structure
However, understanding your roof’s pitch, material type, and local building codes is essential before you climb up. Not every repair job is a candidate for the DIY approach, and knowing the difference protects both your home and your safety.
Common Roofing Problems You Can Fix Yourself
Not all roof damage requires a professional crew. Some of the most frequent issues homeowners encounter are well-suited for a confident DIYer with basic tools. Recognizing these problems early prevents small headaches from turning into major structural failures.
Missing, Cracked, or Curling Shingles

Asphalt shingles are the most common roofing material in North America, and they’re also among the easiest to replace individually. When wind lifts a shingle or UV exposure causes cracking, you can often pop the damaged piece off, apply a new layer of roofing cement, and press a replacement shingle firmly into place. Pay attention to the sealant strip along the underside — that’s what keeps each shingle bonded to the row below.
Minor Leaks Around Roof Penetrations
Plumbing vents, chimneys, and satellite dishes create penetrations through your roof deck. Over time, the caulk or flashing around these areas deteriorates, allowing water intrusion. Replacing old caulk with high-quality roofing sealant or adjusting loose flashing is a straightforward repair that most homeowners can complete in under an hour per penetration.
Gutter and Downspout Issues
Clogged or sagging gutters contribute directly to roof damage by trapping water against the fascia and underlayment. Clearing debris, re-sealing joints, and re-hanging loose gutter sections are beginner-friendly tasks that protect your entire roofing system.
Safety First: Preparing for a Roof Repair Project
Before you set foot on the roof, preparation is non-negotiable. Roof work is statistically one of the most dangerous home maintenance activities, and cutting corners on safety can lead to serious injury. Here’s a step-by-step safety checklist every DIY roofer should follow:
- Check the weather forecast — never work on a wet, icy, or windy roof. Dry, calm conditions are essential.
- Wear proper footwear — rubber-soled boots with excellent traction dramatically reduce slip risk.
- Set up a sturdy ladder — place it on firm, level ground and extend at least three feet above the roof edge.
- Use a safety harness — anchor it to a secure roof ridge or truss point. This is non-negotiable for any repair on a steep pitch.
- Work with a partner — someone should be on the ground to spot you and hold the ladder steady.
- Clear the work area — remove debris from the roof surface and mark off the area below to protect anyone passing beneath.
Never underestimate the importance of ladder safety and fall prevention. If your roof pitch exceeds 6:12 (a 26-degree angle), a safety harness isn’t optional — it’s essential.
Essential Tools and Materials for DIY Roof Repairs
Having the right tools on hand before you start prevents frustrating mid-project trips to the hardware store and ensures professional-quality results. Here’s a consolidated list of what you’ll need for most common DIY roof repair tasks:
| Tool / Material | Primary Use |
| Roofing shovel / pitch fork | Removing damaged shingles and clearing debris |
| Hammer | Securing roofing nails and adjusting flashing |
| Utility knife | Cutting shingles, underlayment, and sealant tubes |
| Tin snips | Cutting metal flashing and aluminum components |
| Roofing nails (galvanized or aluminum) | Fastening shingles, flashing, and underlayment |
| Roofing cement / sealant | Patching leaks and bonding shingles |
| Flashing (aluminum or galvanized steel) | Sealing roof penetrations and valleys |
| Pry bar | Removing old nails and lifting shingles |
| Caulk gun | Applying sealant and roofing cement precisely |
| Safety harness and rope | Fall protection on pitched roofs |
Investing in quality materials — especially roofing cement and galvanized nails — pays off in durability. Cheap alternatives degrade faster and may void any remaining warranty on your roofing system.
Step-by-Step Guide to Fixing Common Roof Issues
Repairing Missing or Damaged Shingles
Start by gently lifting the surrounding shingles with a pry bar to expose the nails holding the damaged piece. Use a hammer to remove the old nails, then slide the damaged shingle out. Slide the new shingle into position, aligning it with the existing rows. Secure it with two galvanized nails placed just above the nail line on the shingle below. Apply a dab of roofing cement over each nail head to prevent water infiltration. Press the surrounding shingles down firmly to restore the seal.

Fixing Roof Leaks Around Valleys and Flashing
Valley leaks are among the trickiest because water converges from multiple directions. Inspect the valley flashing for rust, separation, or lifted edges. Clean the area thoroughly, remove any old roofing cement, and apply a generous bead of new sealant along the valley edges. If the flashing itself is damaged, cut a replacement piece to size using tin snips, slide it under the existing shingles, and nail it in place with roofing nails. Seal all seams with cement and press the shingles back down.
Sealing and Replacing Roof Cement
Roofing cement deteriorates over time due to UV exposure and thermal cycling. For small cracks, scrape out the old cement with a putty knife, clean the surface, and apply a fresh layer with a caulk gun. For larger areas, consider using a roof patch kit that includes a reinforcing mesh for added strength. Always work in direct sunlight so the cement remains pliable and bonds properly.
DIY Roof Repair vs. Hiring a Professional
Understanding when to handle a repair yourself versus calling in a licensed contractor is one of the most important decisions a homeowner can make. The table below breaks down the key comparison factors:
| Factor | DIY Repair | Professional Contractor |
| Cost | Materials only ($50–$200) | Labor + materials ($300–$1,500+) |
| Time Investment | 2–8 hours depending on complexity | 1–3 days including scheduling |
| Skill Level Required | Beginner to intermediate | None required — expertise included |
| Warranty | None (unless manufacturer’s) | Typically 5–25 years on workmanship |
| Risk | Personal injury, improper repair | Licensed, insured, and accountable |
| Best For | Small patches, shingle replacement, sealing | Major leaks, structural damage, full replacement |
As a general rule, if the damaged area exceeds 10 square feet, involves structural decking damage, or covers multiple roof planes, it’s time to call a professional. Attempting major repairs without experience can lead to costly mistakes and void manufacturer warranties.
Advanced DIY Roofing Tips and Common Mistakes to Avoid
Once you’ve handled a few smaller repairs, you might feel confident tackling more ambitious projects. Here are expert tips that elevate your work from amateur to professional-grade:

- Match shingle brands and colors exactly — mixing manufacturers creates inconsistent granule texture and color variation that looks obvious from the ground.
- Work from the top down — always start repairs at the highest point of the roof and work toward the eaves so you don’t walk on freshly repaired areas.
- Never layer new shingles over more than two existing layers — this traps moisture and adds excessive weight to your roof deck.
- Inspect your attic after rain — flashlight inspections from inside the attic reveal leaks you can’t see from the exterior and help you pinpoint the exact entry point.
- Document everything with photos — before, during, and after the repair. This creates a record for insurance claims and future reference.
The biggest mistake DIY roofers make is underestimating the scope of damage. What looks like a small surface crack from the outside can indicate significant underlayment failure or deck rot on the interior. Always investigate thoroughly before committing to a repair strategy.
Frequently Asked Questions About DIY Roofing Repairs
How do I know if a roof leak can be fixed with DIY methods or requires a professional? If the leak is small, localized, and accessible from the roof surface — typically around flashing, vents, or individual shingles — a DIY fix is usually viable. However, if water is staining large ceiling areas, dripping continuously, or accompanied by sagging decking, the damage is likely structural and demands a licensed roofer’s assessment.
What type of roofing sealant works best for permanent leak repairs? Polyurethane-based roofing sealants offer the strongest bond and longest durability for most applications. For metal-to-metal flashing seams, butyl rubber tape combined with sealant creates a watertight barrier. Always check that the sealant is compatible with your roof material — asphalt, metal, or tile — before application.
Can I repair my roof in cold weather or winter conditions? Roofing cement and sealants require temperatures above 40°F (4°C) to cure properly. Cold weather also makes shingles brittle and prone to cracking during installation. If you must repair in winter, use cold-weather rated products, work on a clear sunny day, and avoid stepping on shingles directly.
How long should a DIY roof repair last before needing attention again? A properly executed shingle replacement or flashing repair should last anywhere from 5 to 15 years depending on climate, material quality, and roof pitch. Roof cement patches typically last 3 to 7 years and should be inspected annually for cracking or shrinkage.
Do I need a permit for DIY roof repairs in most states? In many jurisdictions, minor repairs like replacing individual shingles or patching small leaks do not require a permit. However, any work that involves replacing more than a portion of the roof, altering the structure, or changing the roof’s footprint typically triggers permit requirements. Always check with your local building department before starting a project.
Final Thoughts on Tackling DIY Roofing Repairs
DIY roofing repairs empower homeowners to protect their investment, save money, and develop valuable hands-on skills. The key is knowing your limits, investing in quality materials, and never compromising on safety. Start with small, manageable projects like shingle replacement and gutter maintenance, then gradually build your confidence and expertise. When you encounter damage that exceeds your comfort zone or technical capability, don’t hesitate to bring in a qualified professional. Your roof is your home’s first line of defense against the elements — treat it with the respect and care it deserves, and it will serve you reliably for decades to come.