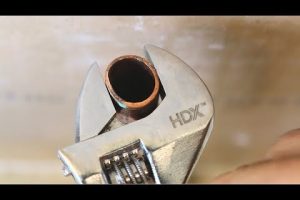
When a dripping faucet or a stubborn drain suddenly disrupts your daily routine, the thought of calling a plumber can feel both urgent and expensive. DIY home plumbing has become one of the most empowering skills homeowners can develop, saving hundreds — sometimes thousands — of dollars in service calls while building genuine confidence in maintaining your own property. Whether you are a complete beginner staring at a leaky pipe under the kitchen sink or an intermediate DIYer ready to tackle a full bathroom repipe, understanding the fundamentals of residential plumbing systems is the key to success. This guide walks you through everything from essential tools and safety precautions to intermediate repairs and advanced projects, all backed by practical recommendations that real professional plumbers use every day.
Why DIY Home Plumbing Is Worth Your Time
Homeowners who invest time in learning basic plumbing techniques enjoy several advantages that go beyond cost savings. Understanding your home’s water supply lines, drainage systems, and fixture connections gives you the ability to respond quickly to emergencies and prevent minor issues from escalating into catastrophic water damage.
The financial benefits alone are compelling. The average cost of a service call for a licensed plumber ranges from $150 to $450, and that is before any parts or labor for the actual repair. Many common plumbing tasks — such as replacing a washer, clearing a clogged drain, or installing a new showerhead — require nothing more than basic tools and thirty minutes of your time. Over the course of a year, these self-performed repairs can easily add up to savings of $500 to $2,000 depending on the complexity of issues your home encounters.
Beyond money, there is a deep satisfaction that comes from solving a problem with your own hands. Homeowners who understand their plumbing systems are better equipped to communicate with professionals when a job truly does require expert intervention, helping them avoid being overcharged or misled by unnecessary work recommendations.
Essential Tools Every Home Plumber Should Own

Before you tackle any plumbing project, having the right tools on hand makes the difference between a smooth repair and a frustrating experience. You do not need a massive workshop — a well-organized toolbox with these core items covers the vast majority of residential plumbing tasks.
Must-Have Basics for Beginners

- Adjustable wrench (10-inch and 6-inch)
- Plunger (both cup and flange styles)
- Pipe wrench for larger fittings
- Plumber’s tape (Teflon tape) and pipe joint compound
- Basin wrench for tight spaces under sinks
- Channel-lock pliers for gripping and turning
- Bucket and rags for water management
- Flashlight or headlamp for visibility
Intermediate Tools Worth Investing In
As your confidence grows, consider adding a pipe cutter, a drain snake or auger, a tubing bender for copper work, a propane torch for soldering, and a pipe reamer for cleaning cut edges. These tools open the door to more advanced repairs involving supply line replacements and drain pipe modifications.
Understanding Your Home’s Plumbing System
A residential plumbing system has two distinct subsystems that every DIYer should understand: the water supply system and the drainage-waste-vent (DWV) system. The supply system brings clean, pressurized water into your home through a main shutoff valve, branching out through copper, PEX, or CPVC pipes to fixtures throughout the house. The DWV system uses gravity to carry wastewater away through a network of drain pipes, ultimately exiting through a rooftop vent that maintains proper air pressure and prevents sewer gases from entering your living space.
Key terminology to know:
- Main water shutoff valve — the master control for your entire home’s water supply, typically located near the water meter or where the supply line enters the house.
- Branch lines — smaller pipes that extend from the main supply to individual fixtures.
- Cleanout plug — an access point in the drain line that allows you to clear blockages.
- Trap — the U-shaped pipe under sinks and drains that holds water to block sewer gases.
- Vent stack — a vertical pipe that allows air into the drainage system to keep water flowing smoothly.
Knowing where your main shutoff valve is located before an emergency occurs is arguably the single most important piece of plumbing knowledge a homeowner can possess. When a pipe bursts or a fixture floods, you need to stop the water flow within seconds, not minutes.
Beginner Plumbing Projects You Can Start With
If you are completely new to home plumbing, start with low-risk tasks that build your confidence and familiarize you with common fixture components. These projects typically require no specialized plumbing knowledge and carry minimal risk of causing water damage.
1. Replacing a Faucet Washer or Cartridge
A dripping faucet is one of the most common household complaints and usually caused by a worn-out washer, O-ring, or cartridge. Turn off the water supply valves under the sink, disassemble the faucet handle, and swap out the worn component. This simple fix can save up to 10,000 gallons of water per year and eliminate that annoying drip.
2. Unclogging a Drain
Before reaching for harsh chemical drain cleaners — which can corrode older pipes — try a plunger first. For stubborn clogs, a manual drain auger can reach 15 to 25 feet into a drain line to break up or retrieve the blockage. Hot water and baking soda followed by vinegar can also dissolve minor buildup in kitchen and bathroom sinks.
3. Installing a New Showerhead or Garden Hose Bib
These are straightforward threaded connections. Apply plumber’s tape clockwise around the male threads, hand-tighten the fitting, and then snug it with a wrench by a quarter turn. Over-tightening is the most common beginner mistake that leads to cracked fittings and leaks.
Intermediate DIY Plumbing Repairs
Once you are comfortable with basic fixture maintenance, you can move on to repairs that involve working with water supply lines, replacing valve assemblies, and handling minor pipe repairs.
Replacing a Supply Line or Shutoff Valve
Flexible supply lines connecting fixtures to the wall are common failure points. Stainless steel braided lines are far more durable than rubber hoses and resist bursting under pressure. When replacing a shutoff valve, always shut off the main water supply first, drain the line, and use a pipe cutter for a clean, square cut on any copper section.
Fixing a Running Toilet
A toilet that runs constantly wastes enormous amounts of water and inflates your utility bill. The culprit is usually a worn flapper valve or an misadjusted fill valve inside the tank. Replacing these components costs under $15 and takes about fifteen minutes. This is one of the highest-impact beginner-to-intermediate plumbing projects.
Clearing a Main Drain Line
When multiple drains in your home are slow or gurgling, the blockage may be in the main sewer line. A powered drain snake (also called a drain auger) can reach the main line from a cleanout access point outside your home. For recurring root intrusion, a mechanical auger with a cutting head is the professional-grade tool that gives homeowners an intermediate-level solution before calling in a camera inspection service.
Advanced Projects: When to Call a Professional
Some plumbing tasks sit right at the edge of DIY feasibility and require a realistic assessment of your skill level. Soldering copper pipes, repiping an entire home, or relocating a plumbing fixture all involve considerations around pressure testing, code compliance, and long-term reliability.
Soldering copper pipes requires a propane torch, proper flux, and lead-free solder. The technique involves cleaning the pipe and fitting, applying flux, heating the joint evenly, and feeding solder into the connection until it wicks around the entire joint by capillary action. A poorly soldered joint will eventually leak, potentially causing water damage inside walls or ceilings.
Repiping with PEX tubing has become the modern standard for residential water supply lines because PEX is flexible, corrosion-resistant, and requires fewer fittings than rigid copper. However, the project involves cutting into walls, properly supporting runs of pipe, and ensuring all connections meet local building codes. Many jurisdictions require a permit and inspection for repiping work, so check with your local building department before starting.
| Project Type | Difficulty Level | Estimated Time | Risk Level |
| Faucet washer replacement | Beginner | 15–30 minutes | Low |
| Drain unclogging with auger | Beginner | 20–45 minutes | Low |
| Supply line replacement | Intermediate | 30–60 minutes | Medium |
| Toilet repair (flapper/fill valve) | Intermediate | 15–30 minutes | Low–Medium |
| Copper pipe soldering | Advanced | 1–3 hours | Medium–High |
| Whole-home PEX repipe | Advanced | 2–5 days | High |
Safety Tips and Common Mistakes to Avoid
Safety should always come first when working with plumbing. Before any project, shut off the water supply and relieve pressure by opening the lowest faucet in the house. Wear safety glasses when cutting or soldering pipe, and keep a fire extinguisher nearby when using an open flame. Never use a flame torch near combustible materials, and always protect finished surfaces with a heat shield or damp rag.
Common mistakes that even experienced DIYers make:
- Forgetting to use plumber’s tape on threaded connections, leading to slow leaks that worsen over time.
- Over-tightening fittings, which can crack brass compression nuts or strip plastic threads.
- Using the wrong size pipe, which causes reduced water pressure or incompatible connections.
- Neglecting to check local plumbing codes, which can result in failed inspections and costly rework.
- Ignoring small drips, which often signal a developing problem that becomes far more expensive if left unaddressed.
Conclusion: Building Confidence Through Practice

DIY home plumbing is a skill that compounds over time. Every repair you complete teaches you something about how water moves through your home, how different materials behave, and how to troubleshoot problems more efficiently. Start small, build your toolkit gradually, and never hesitate to consult a licensed professional when a project exceeds your comfort zone. The goal is not to replace professional plumbers but to become a knowledgeable homeowner who can handle routine maintenance, respond effectively to emergencies, and make informed decisions about when to invest in expert help.
With patience, the right tools, and a willingness to learn from each project, you will find that DIY plumbing not only saves money but also gives you a deeper understanding and appreciation of the home you live in.
FAQs About DIY Home Plumbing
What tools do I need to start DIY plumbing repairs?
Start with an adjustable wrench, plunger, plumber’s tape, channel-lock pliers, a basin wrench, and a bucket. These basics cover most beginner and intermediate tasks. As you take on more advanced projects, add a pipe cutter, drain auger, and a propane torch for soldering work.
Can I replace my own plumbing pipes, or should I hire a professional?
Replacing individual supply lines or a toilet is well within DIY capability for most homeowners. However, repiping an entire home, soldering copper joints, or relocating plumbing fixtures typically requires knowledge of local codes and pressure-testing procedures. Many municipalities require permits for whole-house repiping, which is a strong signal to hire a licensed professional.
How do I know if a plumbing leak is behind a wall?
Signs of a hidden leak include unexplained increases in your water bill, damp or discolored drywall, a musty odor, or the sound of running water when all fixtures are off. A thermal imaging camera can help locate the leak behind walls, but for persistent or severe leaks, a professional leak detection service can pinpoint the issue without unnecessary demolition.
What is the difference between PEX and copper plumbing pipes?
PEX is a flexible plastic tubing that is easier to install, resists corrosion, and costs less than copper. Copper is a rigid metal pipe that offers superior durability, heat resistance, and a longer lifespan. PEX has become the popular choice for residential water supply because it requires fewer fittings and is more forgiving during installation, while copper remains the preferred material for exposed runs and commercial applications.
Is chemical drain cleaner safe for my pipes?
Chemical drain cleaners contain harsh corrosive agents that can damage older galvanized steel and PVC pipes over time. For recurring clogs, a mechanical drain snake or a professional hydro-jetting service is far safer and more effective. Prevention is the best approach — use drain screens, avoid pouring grease down the kitchen sink, and flush drains regularly with hot water and baking soda.
How can I prevent frozen pipes during winter months?
Insulate exposed pipes in unheated areas like basements, crawl spaces, and garages with foam pipe insulation or heat tape. During extreme cold, let faucets drip slightly to maintain water flow, keep cabinet doors open to allow warm air circulation around pipes under sinks, and maintain your thermostat above 55°F even when you are away from home.