


Every homeowner eventually faces a plumbing issue that makes them wish they had paid attention sooner. Burst pipes, slow drains, skyrocketing water bills, and dripping faucets are more than just inconveniences — they signal underlying problems that can snowball into costly repairs if ignored. The good news is that most residential plumbing problems are entirely preventable with the right knowledge and a few smart habits. Whether you are a first-time homebuyer still learning the ropes or a seasoned property owner looking to tighten up your home maintenance routine, these five practical residential plumbing tips will help you protect your investment, save money, and keep your water flowing smoothly year-round. This guide covers actionable steps from beginner-level maintenance to more advanced strategies that even some professional plumbers recommend to their clients.
1. Inspect Your Plumbing System Regularly for Early Warning Signs
Prevention always beats cure when it comes to home plumbing maintenance. A routine inspection — ideally every three to six months — can catch small issues before they become expensive disasters. Walk through your property and pay close attention to areas where plumbing is most vulnerable: under kitchen and bathroom sinks, around the water heater, in the basement, and along exterior walls where pipes are exposed to cold temperatures.
What to Look For During a Plumbing Inspection
- Discoloration or staining on walls, ceilings, or floors near pipes — these often indicate hidden leaks
- Damp spots, mold growth, or musty odors near plumbing fixtures
- Corrosion or mineral buildup on exposed copper, galvanized steel, or brass fittings
- Wobbly or loose toilet bases that may signal a failing wax seal
- Water pooling around the base of your water heater
- Unusual hissing or gurgling sounds inside walls or near drains
Expert Tip: Keep a simple plumbing log — a notebook or even a phone note — where you record the date of each inspection and any findings. Over time, this creates a valuable history that helps you spot recurring patterns and gives plumbers useful context when diagnosing problems.
2. Protect Pipes from Freezing During Cold Months
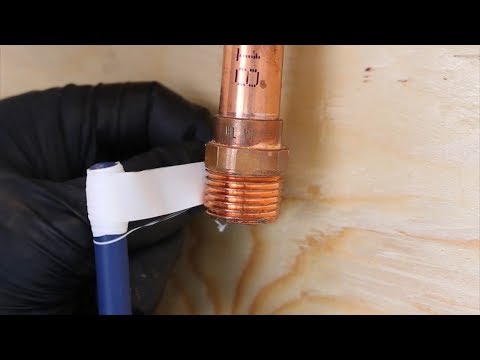
Frozen pipes are one of the most destructive plumbing emergencies homeowners face. When water inside a pipe freezes, it expands and can crack or burst the line, leading to flooding, structural water damage, and mold growth. This is especially critical for homes in northern climates, but even southern regions can experience frozen pipe issues during rare cold snaps.
Step-by-Step Pipe Freeze Prevention
- Insulate vulnerable pipes. Use foam pipe insulation sleeves on any exposed plumbing in unheated spaces like garages, crawl spaces, attics, and exterior walls. These sleeves are inexpensive and available at most hardware stores.
- Seal air leaks. Check for gaps around windows, doors, and foundation vents near plumbing lines. Caulk or weatherstrip any openings that let cold air reach your pipes.
- Let faucets drip during extreme cold. A slow, steady drip reduces pressure buildup inside the pipe and keeps water moving, which makes it harder to freeze.
- Open cabinet doors. Under-sink cabinets in exterior walls often trap cold air. Opening them allows warm household air to circulate around the plumbing.
- Maintain a consistent thermostat setting. Avoid turning your heat down too low at night during winter months, even if you want to save on energy costs.
| Insulation Method | Best For | Approximate Cost | Difficulty Level |
| Foam pipe sleeves | Straight pipe runs in crawl spaces and garages | $0.50–$2 per linear foot | Easy (DIY friendly) |
| Heat tape / cable | Exterior walls and high-risk zones | $15–$50 per 10-foot section | Moderate |
| Spray foam insulation | Large gaps around pipe penetrations | $5–$10 per can | Easy |
| Recirculating hot water system | Whole-home cold-climate protection | $300–$800 installed | Advanced (professional recommended) |
3. Address Low Water Pressure Promptly
Low water pressure is one of the most common plumbing complaints, yet many homeowners simply endure it instead of investigating the root cause. Reduced water flow affects shower comfort, appliance performance, and even your cleaning efficiency. More importantly, a sudden drop in pressure often signals a specific plumbing issue that needs attention.
Common causes of low water pressure include:
- Mineral and sediment buildup in faucet aerators, showerheads, and supply lines — especially in homes with hard water
- Partially closed shut-off valves either under the sink or at the main water line
- Leaking pipes that divert water away from fixtures
- Clogged water filters or whole-house filtration systems that have not been replaced
- Municipal supply issues — always check with neighbors before assuming the problem is internal
Intermediate Fix: Start by removing the aerator from your faucet and soaking it in white vinegar for 30 minutes to dissolve mineral deposits. Clean out any debris, reassemble it, and test the flow. This simple step resolves low pressure issues in roughly 30% of residential cases.
Advanced Consideration: If vinegar cleaning does not help and multiple fixtures are affected, consider installing a whole-house water pressure regulator. Most homes should maintain water pressure between 40 and 60 PSI. Pressure above 80 PSI can damage appliances, fixtures, and seals over time. A pressure gauge costs under $10 and attaches directly to an outdoor hose bib for an easy reading.
4. Practice Proper Drain Care to Avoid Clogs and Blockages
A clogged drain is annoying enough on its own, but the real danger lies in repeated chemical drain cleaner use, which can corrode older pipe systems — particularly PVC and galvanized steel. Instead of reaching for harsh chemical products every time a drain slows down, adopt a proactive drain maintenance routine that keeps your plumbing system healthy long-term.
Best Practices for Residential Drain Maintenance
- Use drain screens in every sink, shower, and bathtub. These small mesh screens catch hair, food particles, soap scum, and debris before they enter the pipe. Clean them weekly.
- Flush drains with hot water weekly. Running a full kettle of boiling water down kitchen and bathroom drains helps dissolve grease buildup and soap residue.
- Use a baking soda and vinegar treatment monthly. Pour half a cup of baking soda followed by half a cup of white vinegar down the drain. Wait 15–20 minutes, then flush with hot water. This natural combination safely breaks down organic buildup without damaging pipes.
- Never pour grease, oil, or fat down the kitchen sink. Even with hot water, fats solidify as they cool and accumulate inside pipes. Dispose of cooking grease in a sealed container and throw it in the trash.
- Schedule a professional drain camera inspection every 2–3 years. This advanced technique uses a small waterproof camera threaded through your drain lines to identify root intrusion, pipe deterioration, bellied sections, or blockages that are not visible from the surface.
5. Know When to Call a Licensed Plumber Versus Handling Repairs Yourself
DIY plumbing repairs can save significant money and build your confidence as a homeowner. However, some tasks carry serious risks — water damage, mold exposure, gas leaks, or code violations that jeopardize insurance claims. Understanding the boundary between what you can safely handle and what requires a professional is one of the most important residential plumbing tips any homeowner can follow.
| Task | Difficulty | DIY Safe? | When to Call a Pro |
| Replacing a faucet washer or cartridge | Beginner | Yes | N/A — straightforward repair |
| Clearing a single slow drain with a plunger or auger | Beginner | Yes | N/A — standard tool use |
| Replacing a showerhead or sink aerator | Beginner | Yes | N/A — no tools needed |
| Fixing a running toilet (flapper, fill valve) | Intermediate | Yes | If the flapper assembly is not available locally |
| Replacing a water supply line (flex line) | Intermediate | Yes | If the shut-off valve is corroded or inaccessible |
| Removing a clogged main sewer line | Advanced | No | Always — requires specialized equipment and permits |
| Repiping a section of the home | Advanced | No | Always — involves wall/floor access and building codes |
| Water heater installation or replacement | Advanced | No | Always — gas and electrical connections require licensed work |
| Any gas line repair or modification | Any level | No | Always — gas leaks pose immediate life-safety risks |
Key Rule of Thumb: If the repair involves gas lines, main sewer lines, water heater connections, or anything that requires cutting into load-bearing walls or structural elements, always hire a licensed and insured plumber. The cost of a professional repair is almost always less than the cost of fixing a botched DIY job.
Conclusion

Residential plumbing maintenance does not have to be complicated or overwhelming. By adopting a proactive mindset — inspecting regularly, protecting pipes from freezing, addressing pressure issues, caring for your drains, and knowing your limits — you can dramatically reduce the likelihood of emergency plumbing failures and keep your home’s water system running efficiently for decades. These five practical residential plumbing tips are designed to be actionable at every skill level, from absolute beginners to more experienced homeowners who want to refine their maintenance game. Start with the easiest tasks today, build your confidence over time, and your plumbing system will reward you with reliable, trouble-free performance.
Frequently Asked Questions
1. How often should I have my residential plumbing system professionally inspected?
Most plumbing experts recommend a professional inspection at least once per year, even if you perform regular DIY checks. An annual inspection allows a licensed plumber to identify hidden issues such as slow pipe corrosion, early-stage slab leaks, or deteriorating sewer lines that are not visible during a standard walkthrough. Homeowners in older properties or areas with hard water may benefit from inspections every six months.
2. What is the best way to prevent a kitchen drain clog?
The single most effective prevention method is installing a fine-mesh drain strainer and cleaning it after every use. Additionally, never pour cooking grease, coffee grounds, or starchy food scraps down the kitchen drain. Running hot water with a small amount of dish soap after washing dishes helps emulsify residual fats. For a deeper monthly clean, the baking soda and vinegar flush method described above works exceptionally well for most residential kitchen drains.
3. Is a tankless water heater more reliable than a traditional tank-style unit?
Tankless water heaters typically have a longer lifespan — often 20 years or more compared to 10–15 years for conventional tanks — and are less prone to catastrophic tank failure. However, they require more frequent descaling maintenance, especially in hard water areas, and have higher upfront installation costs. For many homeowners, the long-term energy savings and reliability make tankless systems a worthwhile investment.
4. What household items should never go down the toilet?
Beyond the obvious — wipes, feminine hygiene products, and paper towels — many people unknowingly damage their plumbing by flushing cotton balls, dental floss, cat litter, medication, and cooking grease. These items do not break down like toilet paper and can accumulate in your sewer line, causing blockages that require professional drain cleaning or even pipe replacement.
5. How can I reduce my water bill through simple plumbing adjustments?
Three adjustments deliver the biggest return: replacing old fixtures with WaterSense-labeled models (which use 20–30% less water), fixing even minor leaks promptly (a single dripping faucet can waste over 3,000 gallons per year), and installing a pressure regulator to keep household water pressure within the optimal 40–60 PSI range. These changes reduce water consumption, lower utility bills, and extend the life of your plumbing fixtures simultaneously.