


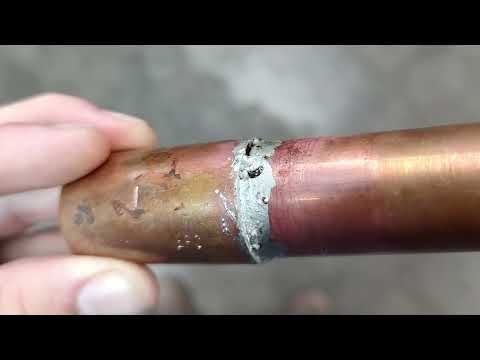
When it comes to delivering clean, reliable water throughout your home, copper plumbing remains the gold standard. However, achieving a leak-free connection requires mastering the art of soldering copper pipes. Many DIY homeowners and even seasoned plumbers encounter frustrating failures when they overlook the nuances of pipe soldering techniques. Whether you are replacing a section of corroded piping or building a new radiant heating loop, understanding how to solder copper pipes properly is essential for a permanent, watertight seal that can withstand decades of pressure and temperature fluctuations. In this comprehensive guide, we will dive deep into copper plumbing soldering tips that elevate your skills from basic prep to professional-grade finishing, ensuring every joint you make holds strong against the elements.
Mastering the Basics: Essential Tools and Materials
Before striking a spark, having the correct tools is non-negotiable. Using subpar equipment is the fastest way to a failed joint. For any plumbing torch techniques project, you need more than just a flame and filler metal.
- Propane or MAPP Gas Torch: Propane is standard, but MAPP gas burns hotter and is preferred by professionals for larger diameter pipes.
- Lead-Free Solder: Always choose lead-free solder, especially for potable water lines, adhering to modern plumbing codes.
- Wire-Bristle Brush and Emery Cloth: Critical for mechanically cleaning the pipe exterior and fitting interior.
- High-Quality Flux: A paste flux specifically formulated for copper ensures the solder flows freely and prevents oxidation.
The Step-by-Step Copper Pipe Soldering Process

Preparation and Cleaning (The Foundation)
The secret to a strong soldering joint lies entirely in the preparation. Solder will not bond to a dirty or oxidized surface. Start by cutting the copper pipe square using a tubing cutter to avoid crushing the interior diameter. Next, use emery cloth to sand the outside of the pipe end until it shines bright. Inside the fitting, use a wire-bristle brush to clean the bore. Apply a thin, even coat of flux to both the pipe and the fitting interior. The flux chemically removes oxidation during heating, allowing the filler metal to wet the surface properly.
Applying Heat and Solder (Intermediate Execution)
Once your joint is prepped, bring out the heat. Many beginners make the mistake of applying the solder directly to the torch tip, which results in a cold joint. Hold the flame tip against the copper joint, rotating constantly to distribute heat evenly. You want to heat the pipe, not the fitting. After 15 to 20 seconds, touch the solder to the joint. If it melts instantly and is sucked into the pipe by capillary action, you have reached the correct temperature. Apply the solder around the entire circumference until you see a ring of molten solder encircle the joint.
Advanced Cooling and Inspection (Pro-Level Finishing)
Advanced plumbers know the work isn’t done once the solder is applied. Allow the joint to cool naturally without disturbing it, as this creates internal voids. Wiping the joint with a damp rag while hot can create a smooth, professional bead, but do this carefully to avoid misaligning the fitting. For a final inspection, check the visible joint for a uniform, shiny ring of solder. If you see gaps or dull spots, the joint has failed and must be re-done.
Advanced Techniques for Flawless Joints in Challenging Situations

Once you have mastered basic sweating fittings, you will face more complex plumbing scenarios. Working with existing infrastructure or tricky geometries requires refined copper plumbing soldering tips.
Soldering in Tight Spaces
When working in crawlspaces or behind walls, maneuvering a large torch is impossible. Switch to a small, pen-style torch or a heat sink clamp to manage thermal load. Pre-heat the fitting slightly before applying the solder to ensure the joint reaches temperature before surrounding materials catch fire.
Vertical and Overhead Joints
Gravity works against you when soldering vertical or overhead joints. The molten solder will drip away if you are not careful. Apply a heavier coat of flux and use a slightly larger diameter solder wire. Heat the pipe first, then the fitting, and apply the solder at the 6 o’clock position first, letting it flow upward via capillary action to form a complete seal.
Common Soldering Mistakes vs. Best Practices
Understanding what goes wrong is just as important as knowing the right technique. Below is a comparison table outlining common pitfalls and how to avoid them.
| Mistake | Consequence | Best Practice |
| Insufficient Cleaning | Cold joint, poor adhesion | Use emery cloth and wire brush until bright |
| Overheating the Joint | Burns off flux, creates oxidation | Heat pipe evenly, remove flame before applying solder |
| Too Much Solder | Solder drips inside pipe, creates restriction | Apply only until capillary action pulls it in |
| Skipping Flux | Solder does not flow, joint leaks | Always use adequate flux for proper wetting |
Expert Tips for Long-Lasting Copper Joints
Even if you have followed the basic steps perfectly, subtle nuances make the difference between a joint that lasts fifty years and one that springs a leak next month. Here are advanced recommendations to elevate your pipe soldering techniques.
- Purging with Nitrogen: When soldering close to wooden joists or inside walls, insert a nitrogen tube into the fitting before heating. This prevents the wood from catching fire and eliminates internal oxidation, resulting in a cleaner, stronger seal that won’t degrade over time.
- Matching Diameters: Ensure your solder and flux are rated for the pipe size. Thicker walls require more heat and slightly larger solder diameters to fill the joint completely.
- The Two-Pass Method: For larger diameter pipes (1 inch and up), make a tack weld first, then complete the full circle. This crucial step prevents the fitting from rotating or pulling out of alignment during the final application of heat and solder.
- Keep a Dry Cloth Ready: Moisture is the enemy of a cooling joint. Have a dry rag nearby to wipe away excess flux residue immediately after cooling, ensuring a flawless appearance.
Frequently Asked Questions (FAQs)
How to solder copper pipes without sweating?
If you are looking for alternatives to sweat fitting copper, you might consider compression fittings or push-to-connect systems as a no-flame option. However, sweating is the industry-standard method for creating the strongest, most permanent seal on copper pipes. While alternatives exist, they do not offer the same level of heat resistance or structural integrity as a properly executed sweat joint. If you absolutely must avoid the torch, press-fit copper fittings are the best mechanical alternative, utilizing an O-ring and stainless steel teeth to grip the pipe securely without the need for a soldering torch.
What is the best flux for copper plumbing?

For potable water lines, a self-piercing, water-soluble, lead-free flux paste is your best bet. Look for fluxes specifically rated for plumbing and potable water applications, as acid-based fluxes designed for electrical work can corrode the pipe internally over time. A good flux should be yellowish and smooth, ensuring it remains active long enough for the solder to flow completely around the joint.
Why is my soldering joint leaking?
A leaking soldered joint is almost always the result of a cold joint, which occurs when the pipe is not hot enough to melt the solder upon contact, or when the joint is disturbed while cooling. Contamination from dirt or excess flux residue can also prevent the solder from bonding. If a leak develops, you must cut out the failed section, clean thoroughly, reapply fresh flux, and reheat until the solder flows perfectly via capillary action.
How to prevent soldering burnout?
Soldering burnout happens when torch heat ignites surrounding insulation or wood framing. To prevent this, always use a fire cloth between the torch and combustible materials. Apply heat quickly and efficiently; do not linger on the joint. Using a heat sink clamp on the opposite side of the joint draws heat away from vulnerable structures, giving you a larger window to apply the solder safely.
What temperature to solder copper pipes?
Copper plumbing soldering requires reaching approximately 400 to 450 degrees Fahrenheit. Your propane torch will easily reach this temperature, but the key is not just the flame temperature, but how long you apply it. Keep the torch tip about one to two inches away, rotating constantly. Once the flux bubbles and turns brown (but not black), and the solder melts instantly when touched to the pipe, you have reached the ideal working temperature to apply the filler metal.
Conclusion
Mastering copper plumbing soldering tips is a rewarding skill that saves money and ensures the integrity of your home’s water supply. By focusing on meticulous cleaning, proper flux application, and precise heat control, you can create joints that will outlast the house itself. Remember, patience is your greatest tool; rushing the process is the only guaranteed way to a failed joint. Take your time, follow these professional techniques, and you will solder like a seasoned plumber in no time.